Removing the freewheel is easy. Just get the lockring tool in place and turn counter clockwise to remove the lockring. Then slide the freewheel from the hub.
If you do not have a lockring tool then a pair of pliers will work. but some or more damage to the lockring is likely.
Lockrings for racing models can all be removed with the tool pictured on the right. For Diabolo BMX and ATB/MTB a different lockring is supplied, the museum at this point has no information on a specific tool to undo these.
In the Helicomatic system the bottom largest 3 (ATB/MTB) or 4 (racing) cogs slide onto splines in the freewheel, the other cogs are threaded onto the freewheel and/or on top of eachother.
Start with the smallest cog and using two chainwhips place one chainwhip around the bottom cog and the other around the top cog. Turn the top cog counter clockwise. This may take some effort but should result in the cog unscrewing. Keep removing the top cogs where necessary until you are left with cogs that simply slide of the freewheel.
The 8 speed freewheel assembly that, for example, could be found on the Peugeot Force 8 commuter cycle is different. Here the smallest cog is actually part of the freewheel itself. All the other 7 cogs slide into splines from the bottom of the freewheel upwards and a solid ring is forced onto the bottom of the freewheel to hold the cogs in place. Removing the cogs from this assembly mains you have to destroy this ring. Commuter cycles were obviously not deemed worthy of having custom gearing options.
Two tips:
if you find that you cannot apply enough force to unscrew the cog then try to put the freewheel back on the wheel and try again and/or place a lever on your chainwhip handle.
if you have only one chainwhip try to hold the bottom cog in a vice using two blocks of hardwood to protect the teeth from damage.
After removing the cogs it is possible to dissasemble the freewheel itself. At this point it is worth to point out that this in itself is not necessary, nor part of any regular maintenance that is required. Keeping the freewheel oiled with light oil should keep it in good working order.
However academic interest demands disassembly. The disassembly of the racing model is as follows:
Place the freewheel back on the hub and place a very specific tool (VAR417) on top of the freewheel into the notches of the freewheel cone. Now turn the tool clockwise. You can now remove the cone ring and reveal the ball bearings. If you are not carefull the inside body will now fall out of the bottom of the freewheel the ball bearing will go everywhere.
Tip:
If you do not have the tool to remove the cone ring, then try tapping it with a small punch tool or chaser.
To re-assemble the freewheel, 'glue' the ball bearings with petroleum jelly into place. The petroleum jelly will dissolve eventually in light oil.
The ATB/MTB freewheel is different form the racing model, in size, but also in the cone ring used. This cone has two small holes visible on top of the freewheel.
Place the freewheel (having removed all the cogs) back on the hub. Whether a specific tool existed for the job is unknown (and a pin spanner was not available at the museum). With a punch tool in one of the two holes the ring can be tapped clockwise to slowly and surely undo the cone ring. You may need to tap around full circle a couple of times. But anticipate the moment of release carefully as 84 ball bearings will fall all over the place if you do not perform the final twist over a suitable container.
Apart from the bearings the freewheel consists of the same basic parts, the cone ring, holds all in place, the inside body with two pawls and the outside of the body with the teeth of the ratcheting ring.
One or more shims may be on top of the inside body to fill in any gap in engineering.
Looking at the pawls and springs it is actually amazing that these small parts can keep the forward motion transferred to the wheel without breaking.
(See the galleries for more details and photo's).
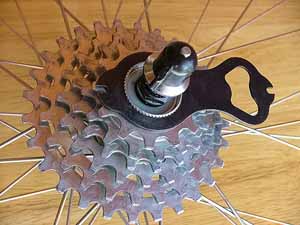
Freewheel lockring tool in place
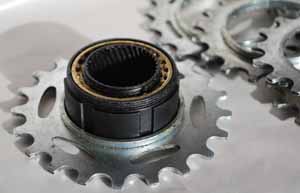
A type 700 freewheel with cogs removed, note the splines on the body, these will hold the first four cogs all others are screwed onto the thread above or on top of eachother.
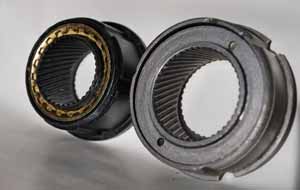
Racing and ATB/MTB freewheel side by side.
The notches in the racing model will accept the tool below, for the ATB/MTB a pin spanner is required.
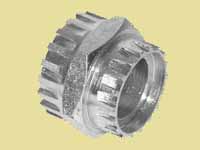
Cone lockring removal tool (racing models)
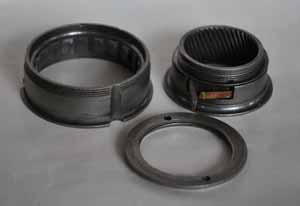
The three main components of the MTB/ATB freewheel, outside body top left, top right inside body with one of the pawls showing and the cone ring below.